The trick is basically to use a location element in the Web.config file, containing the authorization rules for that particular URL, as shown below:
<location path="mypage.aspx">Another important piece of information is that the location element is defined within the configuration element, so that it is a top-level element (the same level as, say system.web or appSettings.)
<system.web>
<authorization>
<allow verbs="GET" users="*"/>
</authorization>
</system.web>
</location>
After editing the Web.config, you need to change the IIS settings to support both, Windows authentication and anonymous access. This is done in the Web site properties dialog box. Go to the Directory Security tab and click on the Edit button of the Anonymous access and authentication control section, as shown below:
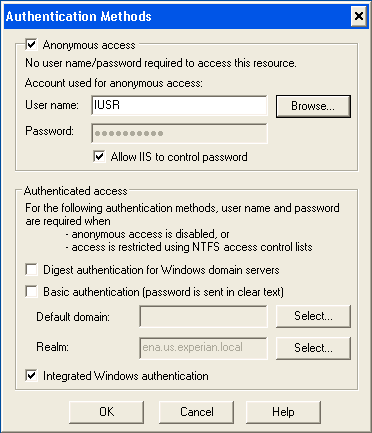
The Authentication Methods dialog is displayed. Make sure that both, the Anonymous access and the Integrated Windows authentication checkboxes are checked, as shown below.
That's it! Please bear in mind that the rest of the application already had Windows authentication configured (which I am not showing for the sake of brevity). Publish the application to the server and test it. The URL that you configured in the previous steps should come up without the browser asking for your password*.
References:
[1] Setting authorization rules for a particular page or folder in web.config by Guru Sarkar.
* Note that if you are using IE, you may not get asked for a password even if one is being sent to the server. This depends on your IE zone settings configuration.


No comments:
Post a Comment